
It’s summer. It’s warm and sunny (sometimes) and it makes me think of flip fops, bright pink nail polish and toe rings. I like them a lot, and used to have a few. Instead of buying more, what does a maker do? We make our own.
Get some good wire and some jewelry pliers. Let’s get to wire wrapping!

DIY Toe ring supplies
- Thing-A-Ma-Jig
- jewelry pliers
- jewelry wire

Step 1: make the first wire swirl
Using the rounded pliers, twist the wire until you’ve made a swirl.

Step 2: create the ring loop
Use your Thing-A-Ma-Jig to create the loop that will become the ring.
Step 3: create the second swirl
Now, you’re going to do the same thing you did for the first swirl for the second. The only difference will be be that the swirl will twist in the opposite direction.
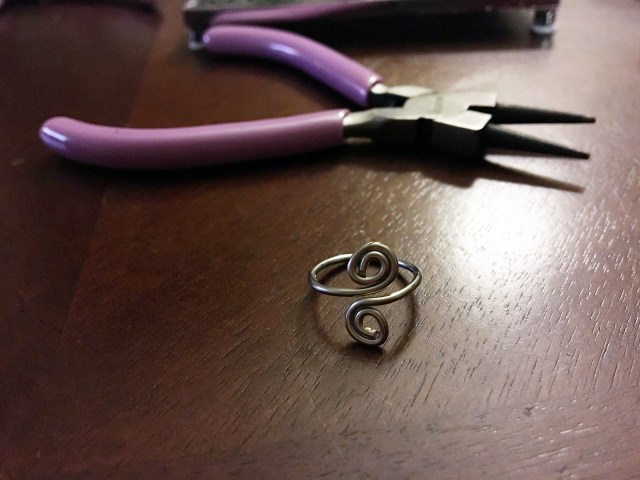
When you’re finished, you’ll have your own wire wrapped toe ring!
I’d love to hear your thoughts. Leave them in the comments!

This tutorial is part of The Craft Challenge 2017. The ladies listed below are all contributors and have their own unique tutorial to share with you! Take some time and check out their July craft projects.
Links will be updated to their tutorials when their posts are available.
Happy crafting!

Great idea and fabulous instructions!
Thank you so much! I really try to make the directions as concise as possible. So glad you like it.
Pingback: Paper Mache Rain Cloud - The perfect craft for a rainy day! |A POP of Red
Pingback: DIY Scarf Organizer from Cardboard and Fabric |A POP of Red
Pingback: The Craft Challenge 2017 | Make Something Mondays!