We’ve been apart for quite some time. I’ve been a busy girl and have had hardly any time for crafting. It’s something I’ve missed. So, I have a present for you. I have a gift bag.
Okay, I’m going to teach you how to make a gift bag… from scrapbook paper. Paper is really amazing. You can do so much with it. This particular paper craft is really easy to make and will hold lightweight items. I was thinking Valentine’s Day candy.
You’ll only need a few supplies to make your own.
Paper gift bag supplies
ruler
ribbon
pencil
hole punch
scrapbook paper (12×12)
Step 1: fold the edges inward
Find the center of the scrapbook paper and fold the sides into the center line.
Step 2: measure the base of the gift bag
Turn the paper horizontally and find the center again.
Then, measure 1″ in both directions and mark it with your pencil.
Repeat this step on the opposite side of the paper.
Step 3: Fold the base of the gift bag
Fold inward from one end to the other to match the marks you just created. You should have something that looks like the image above.
Step 4a: create the basket
Lay the paper flat again. Then, pinch one of the folds you just made.
Pull the piece you’re pinching toward the the top of the paper, along the edge.
The section you’re holding should meet the fold.
Repeat that step on all 4 sides.
Step 5: fold the corners upward to create a basket
Fold both sides of the paper upward so you have something that looks like this.
Step 6: hole punch the top of the gift bag
Pinch the top of the paper together and punch 2 holes, centered.
Step 7: tie it with a bow
Push a ribbon through the newly punched holes and tie a bow to hold it shut.
When you’re finished, you’ll have a cute little gift bag to give to someone special.
Halloween is right around the corner and trick or treaters are ready for their candy.
Every year, the apartment complex I live in participates in trick or treating for the kids in the building and I always use it as an opportunity to get creative. This year, I’m aiming at the treat bags. Since I have a surplus of Halloween scrapbook paper, this was an ideal project.
It’s a really easy craft and doesn’t take too long. Although, I wouldn’t recommend taking this route if you’re going to be giving candy out to more than 20 kids. You’ll be crafting for quite a while.
If you’d like to make your own, gather these materials and follow the step-by-step instructions below.
Halloween Treat Bag Supplies
Tape
Ruler
Scissors
Halloween-themed scrapbook paper
Step 1: cut your scrapbook paper
Measure and cut the scrapbook paper to about 6×8″.
Step 2: fold the paper into a cylinder
Create a cylinder with your halloween paper and tape it in place.
Step 3: tape the bottom of the treat bag
Pinch one end of the cylinder and tape it shut. This will be the bottom of the treat bag.
Step 4: fill the treat bag & seal it
Drop in the candy. I recommended mini candy bars, jelly beans, fruit snacks or other small treats.
Then pinch the top of the treat bag closed, but in the opposite direction of the bottom (in step 3). Tape it in place.
You’re done! Make a few more and you’re ready for parties and trick or treating!
I’d love to hear what you think! Leave your feedback in the comments!
This tutorial is part of The Craft Challenge 2017. The ladies listed below are all contributors and have their own unique tutorial to share with you! Take some time and check out their October craft projects.
Links will be updated to their tutorials when their posts are available.
Some wrapping paper is really cute, but most of it is boring and common. Sometimes it’s nice to change it up and make your own, so to speak.
My best friend’s birthday was this past weekend and my dilemma was getting the gifts to fit in the baskets I had. (Based on this blog post, I obviously deviated for the basket idea.) Eventually I gave up and moved to a box. A box that fit my boots.
I wanted something fall-inspired but also girly, because Kelly is quite girly. I settled with brown paper, off-white lace and orange, brown and yellow plaid ribbon.
fall-inspired gift box supplies
box
lace ribbon
brown paper
plaid fall ribbon
hot melt glue and gun
You can get the brown paper at any craft store. You might be able to find it at Walmart or Target too. If not, there’s always the internet.
Step 1: Wrap the box lid
Start with the lid. Cut 4 slits on each corner of the box about the hight of the lid.
Fold those inward and glue them to the box.
Then fold the remaining brown paper flaps over the lid and glue them down.
Step 2: wrap the box bottom
Repeat step 1 for the bottom of the box.
Step 3: wrap the ribbon around the gift box
Place the lace ribbon flat on the floor and place the box over top of it, face down.
Then twist the ribbons around each other and pull them in opposite directions so you form a cross on the back of the box.
Pull your loose ends around to the front and flip the box front side up.
Slide the ends under the strip of lace already crossing the front of the box.
Tie a knot over top of it.
Then, tie another knot around it with your plaid ribbon.
Step 4: tie the ribbons in a bow
You have two options, tie a single bow with both ribbons, or tie two bows separately.
I chose two bows:
Tie a bow with the lace ribbon.
Tie a bow with the plaid ribbon.
When you’re done, you gift box should like the images above. Brown paper, lace and plaid ribbon is quite fall-esque, I think. I love the way they look together. <3
Quick, easy and unique.
I’d love to hear your thoughts. Leave them in the comments!
Tea is such a good gift. You can share it any time: when someone is sick, for special occasions, for fun… Whenever really. But it’s no fun to just give people a box of tea. It’s much more exciting to gift in unique packaging.
This tea bag holder is wonderful and makes gifting just a few teabags more personal.
You only need a few supplies and you might have them in your craft box already.
Paper tea bag holder supplies
scissors
ribbon
hole punch
scrapbook paper
ruler (optional)
Step 1: cut a scrapbook paper square
Cut a square in your scrapbook paper.
Step 2: fold the points inward
Turn the paper so one of the points is facing upward.
Place the teabag at the top for measurement and fold the points on the right and left inward like in the image above.
Step 3: fold the teabag holder to stand on its own
Create an A shape in the center of the paper. This will help the tea bag holder to stand on its own.
Start by folding the points at the top and bottom together so the inside of the holder is facing outward.
Then, fold them inward about an inch from the center folder on both sides to create the shape above.
Step 4: tie the teabag holder shut
Punch a hole in the top of the teabag holder, push a ribbon through and tie it closed.
You’re ready to gift your tea! You’ll be able to fit a few teabags in the newly created holder. Perfect for a quick, thoughtful gift.
Happy crafting!
This tutorial is part of The Craft Challenge 2017. The ladies listed below are all contributors and have their own unique tutorial to share with you! Take some time and check out their August craft projects.
Links will be updated to their tutorials when their posts are available.
Did you know that the total volume of gift cards is projected to reach $160 billion by 2018? That’s a whole lot! Obviously, some of that is composed of digital cards, but that still means that many people are giving gift cards in crappy envelopes or wasting money on buying the metal holders.
Can we all agree that opening gifts is the most exciting part? Let’s make the gift card experience a little more exciting then. We’ll make our own!
Paper Gift Card Holder Supplies
ruler
embellishments
scrapbook paper
scissors/Xacto knife
double-sided tape
mat board (optional)
Step 1: fold scrapbook paper in half
I started with an 8.5×11″ piece of paper.
Fold it in half with the fun side facing inward.
Step 2: create space for a pocket
The crease in the paper you see below the gift card is the first fold we made.
Now, we need to make two more folds, one on each side of the first crease. The folds should be about half the size of the gift card and creases should be going in the opposite direction from the first.
When you’re done, you should have an upward fold in the paper like in the second image above.
Step 3: shorten one end of the paper
Measure about 1.5″ down and cut off that portion of the paper. You can do this on either side.
Step 4: fold the long end of the paper
To create a flap for our holder, we’re going to make one more crease on the long end of the paper. This should fold over the short end when everything is folded up into an envelope.
Step 5: tape the folds together
Using double-sided tape, adhere the folds together. Make sure you only use the tape on the edges and bottom. We need to make sure there’s room for the gift card!
Step 6: create a pocket for the gift card
Cut down into the fold like in the image above to create a pocket for your gift card.
Put the gift card in place.
Step 7: seal and embellish
Close up the gift card holder.
Seal it with a ribbon or more scrapbook paper and embellish as you’d like.
When you’re done, you can gift your newest creation. Homemade gifts are the best ones.
This tutorial is part of The Craft Challenge 2017. The ladies listed below are all contributors and have their own unique tutorial to share with you! Take some time and check out their February craft projects.
Links will be updated to their tutorials when their posts are available.
As many of you may know, my husband started a company not long ago. The downside of that is the paperwork that comes along with it. There are papers aaaaaallllllll over my house. Piles upon piles, and it drives me up the wall. I had to find a way to organize them.
The best craft projects come out of a need for something. I needed an organizational structure for all of the papers. You can make an organizer too. All you’ll need is a few supplies and 15-20 minutes.
Paper Organizer Supplies
cereal box
duct tape
scissors
Step 1: frame the cereal box
Cut the edges of the cereal box at a downward angle.
Then cut across so the sliced edges meet.
Step 2: Cover the box in Duct Tape
Starting with the edges you just cut, Duct Tape the corners and try to get them as even as as possible.
Then, work your way down the box, smoothing the layers as you go.
As I mentioned last week, my mom was putting together a card shower for my Grandma’s birthday. She asked if I would make a sign for the foam board she was going to display all of the cards on. Sounds like a Make Something Mondays craft, right?
It took some time to get everything together but it turned out well. Keep reading if you’d like to make you’re own. I made a template which is available below for you to download.
Paper flag banner materials
my templates below
scrapbook paper
glue stick
scissors
I suggest using scrapbook paper with a variety of designs. It makes for a fun banner.
Step 1: Download and print the templates
Right click on the images below and save. All three files are 8.5×11″ so you will be able to print on regular printer paper.
The larger flag on the template above is for the scrapbook paper cut outs.
The smaller flag is for reference. When you print the templates below, they should be the size of the the small one above. Or should at least fit within the scrapbook paper template.
Print all 3 templates.
There are a few extra letters, just in case you need them.
Step 2: cut out the paper flags and pair them
Use the larger flag template to cut make the flags with scrapbook paper like the pink flag in the image above.
Step 2: glue them together
Glue the lettered flags inside of the scrapbook paper flags.
When you’re finished, you’ll have something that looks like the banner in the image above. You can punch holes in each flag and string them together, or you can glue them to a foam board. Whatever you like.
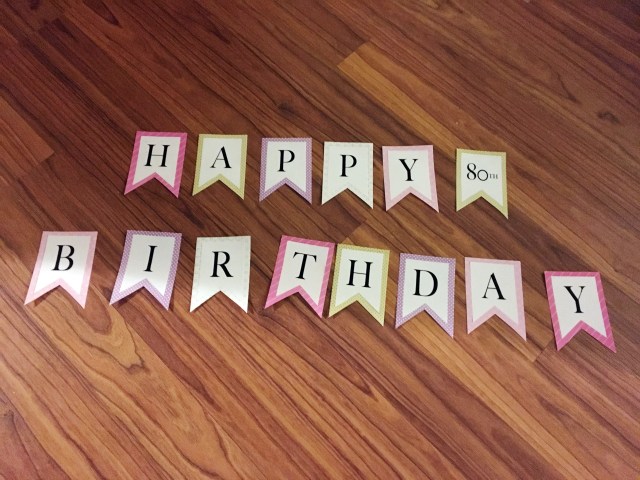
There’s a special person with a birthday coming up! It’s my Gram. My family is throwing her a card shower this year. I had no idea what this is, but apparently you ask a bunch of people she knows to send her a card. (It’s ok, she doesn’t even use the internet so she’ll never know I’m talking about it.)
I’m not a big fan of the holiday card thing unless the card is unique. What value is a piece of paper with a saying from some stranger? Meh. I like to personalize cards, and the best way to do that is to make them yourself.
Homemade Birthday Card Materials
Hole punch (round)
Scrapbook paper
Glue stick
Cardstock
String or a pen
Step 1: make the balloons
Hole punch the scrapbook paper into circles for the balloons.
Step 2: glue on the birthday balloons
Organize the circles onto the cardstock paper. Glue them in place when you like the way they look.
Overlap them for the appearance of depth.
Step 3: balloons need strings
Either glue on your string or draw them on with your pen.
I chose the pen because I wanted to add the “happy birthday” to the middle balloon string.
And you’re finished! Flip the card over and write your message on the back.
I read a lot. Most of the time, I’m reading 2-3 books at once because I like to soak up a lot of information. Topics change a lot too. Sometimes I want to educate myself but other times I’m in the mood for some mindless fiction. It depends on the day.
Regardless, books in-progress need bookmarks. I love the elaborate fun markers, but I can never justify paying for something like that. So, I make my own. And I can make them as exciting as I want them to be.
This week, I’m working on some bookmarks for the corners of the pages. It works really well. They just slide on one of the corners and it’s easy to find your place whenever you’re ready to start reading again.
If you’re interested in making your own, keep reading and I’ll show you how I made mine. Oh, I also have some bonus templates for you to download to make the process easier.
Materials needed for paper bookmarks
Glue
Scissors
Scrapbook paper
My downloadable template (below)
Step 1: download the bookmark template
Right click the image above and click “Open image in new tab”.
Then, print the image. (file > Print.)
Step 2: cut out the template
Cut the template out. You can do this by printing the template I provided and then tracing it onto your scrapbook paper.
Or you can print it directly onto your scrapbook paper.
Your call.
Step 3: fold the paper
Place the scrapbook paper face down so that the pattern you want displayed on your bookmark is against the surface you’re working on. I want the green flower design, so that is against the table.
Fold one of the legs inward so that it follows the contour of the diamond shape.
Repeat that on the other side. Glue the second leg on top of the other one.
You should have something that looks like this.
I used double-sided scrapbook paper, so I hope the image isn’t confusing. I apologize if it is. Please leave a comment if you need further instruction.
Repeat that as many times as your would like. I made an extra one, just in case I find another book I want to read in the next day or two.
Now you can slide your new bookmark onto the page you want to come back to. It’s so cute and minimal. I love it. It doesn’t stick out from the pages, so the book fits in my bag without any worry of bending or destroying my bookmark.
I have another goodie for you!
If you like to color, download my coloring-page bookmark templates below.
Follow the same steps I provided above and then color til your heart’s content.
For example, I used the pattern in the first template design in a drawing recently. It turned out like this:
I’d love to know what you think and I’d love to see what you make. Leave your thoughts and ideas in the comments.
If you’re interested in some other DIY bookmarks, check these out:
These are made from paint samples and Sharpies. The project is super easy and you can turn them into anything you want. I especially enjoy the gradient created from the paint swatches.
If these didn’t stick out from the edges of the pages, they would be my favorite bookmarks ever. I made these years ago and still use them for books that sit on my nightstand. Not so much for the ones I carry with me.
I was a bit more in the Fall mood when I made these bookmarks. The leaves were beautiful… all different colors and not quite crispy yet. It was the perfect time to make them into bookmarks.
These were very enjoyable to make. They’re similar to the doodle bookmarks above, except with these you would use thick paper and watercolor paints. Oh, and a marker. You can write or draw whatever you want on them.
I’m so late at posting my Make Something Mondays craft today! It’s been a very busy weekend; so busy that it reminds me how important organization is in my life. I thought the perfect craft to reflect that would be a whiteboard calendar.
I hate buying calendars, because I’m just going to throw them away at the end of the year. I haven’t found a great way to reuse them, so if I don’t have to buy them, I’m going to avoid it. This was a great alternative.
The supplies are easy and cheap. If the Dollar Store sold scrapbook paper, I’d call it a Dollar Store Craft because it’s very affordable. Way more affordable if you’re remembering that you can use this year around.
Want to make one? Follow the tutorial below.
Whiteboard Calendar Materials
Glue
Ruler
Frame
Pencil
Color square scrapbook paper
Exacto knife & cutting board OR scissors
This is the scrapbook paper pad I used for the color squares. I bought it at Michael’s for a few bucks.
Step 1: cut up the color squares
The size of your squares will depend on the size of your frame. Remember that the frame is going to overlap the squares a bit, so leave extra space around the edges.
You can cut them all into little pieces if you want. I prefer to leave mine in a vertical slice so that I can better maintain the space between each section.
Step 2: glue the colored pieces into place
I highly recommend lining up your sections on the paper before gluing anything so that you get an idea of what it will look like first. When you’re happy with the layout, glue the pieces into place.
Step 3: frame it
When the glue is dry, frame them.
Write in your dates and you have your very own whiteboard calendar!
You can make your calendar bigger or smaller if the space within the squares doesn’t seem adequate with the 12×12″ frame.
As always, I’d love to hear your thoughts. Leave them in the comments!