
I’ve been on a fancy tape kick for the past few weeks. I’ve been using decorative Duck Tape and Washi Tape on everything… pencils, boxes, my sketchbook, etc.
I’d been in the market for a skin for my laptop, but it’s about 7 years old and will probably need replaced soon, so I was contemplating whether it was worth the money. Of course, if I can find a way to make my own, I’m certainly going to. This was no exception. Guess what I used.
Yep, Washi Tape.
Why I chose Washi Tape:
- It’s cheap (and I have a lot of it)
- It provides a protective cover
- It’s easy to remove and leaves no sticky residue
So, why not try to make my own computer skin with it?
Exactly, there’s no good reason not to.
If you want to spice up your laptop and have a few bucks to buy some decorative masking tape, keep reading!

Washi Tape Laptop Skin Materials
- Scissors
- Laptop
- Washi Tape

Step 1: your Washi Tape
All you have to do is measure out your tape and cut it off at the edges.
Layering in pretty colors and patterns makes a nice skin.
When you’re finished, it should like something like the image below.
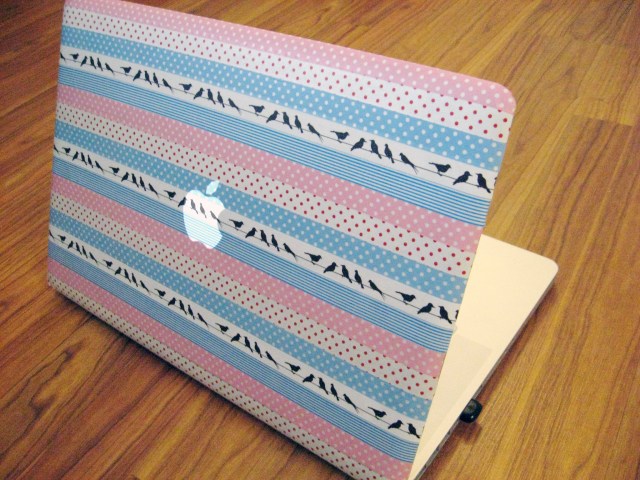
I love how the Apple logo shines through the tape. It looks neat, especially with the bird pattern.
You could do it in all one color or just stick with a similar pattern.
Let me know what you think! Is there a pattern or color you’d prefer?
Happy crafting 🙂

Very nice.
Thanks! I like the colors.
It looks so pretty now! I like that you can still see the apple logo shining through 🙂
Me too, Hannah! That’s my favorite part.
Love your choice of washi tape, especially that bird one 🙂
Thank you, Emma! I like the bird tape too. It’s the best.
Hmm, I have black electrical tape, and green and yellow electrical tape. Maybe?
Jim
You could. It might get a bit sticky though.
Superb…idea
Thank you!
That’s so nice! So cute!
diywithme220
Thank you! I love washi tape.
Same!!
Pingback: Amazing Washi Tape Projects